

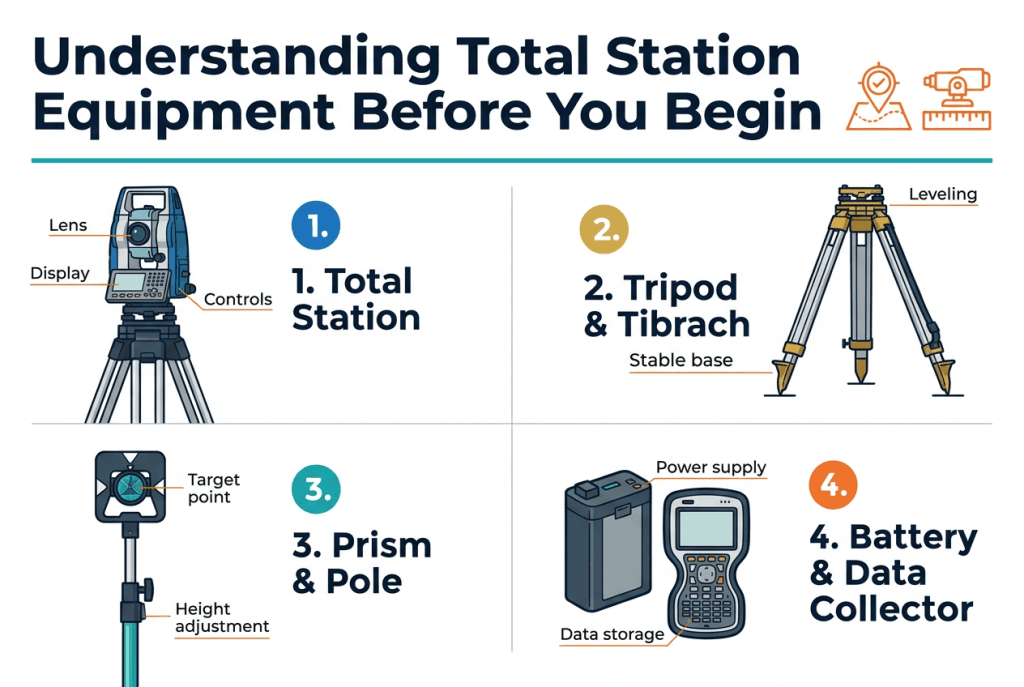
Key Components of a Total Station and Their Functions
Before I ever set foot on a job site, I make sure I actually understand what I’m working with. A total station is essentially a sophisticated optical instrument that combines an electronic theodolite with an electronic distance measurement (EDM) device, all wrapped into one unit. Knowing what each part does saves me a huge amount of troubleshooting time in the field.
Here are the core components I always familiarize myself with before a total station survey:
- Telescope: This is my primary sighting tool. It lets me visually lock onto a target prism or reflectorless surface. The magnification typically ranges from 26x to 32x depending on the model.
- EDM (Electronic Distance Measurement) unit: This fires an infrared or laser beam to measure distance. Without this, I’d just have an expensive theodolite.
- Horizontal and vertical circles: These are the encoded discs that measure angles. They feed data directly into the onboard processor.
- Onboard processor and display: This is the brain of the instrument. It calculates coordinates, stores data, and runs any built-in survey software I rely on during data collection.
- Data storage or memory card: Where all my field measurements live until I download them back at the office.
- Tribrach and leveling screws: These sit between the instrument and the tripod. I use them to center and level the total station precisely over a control point.
- Compensator: An automatic leveling sensor that corrects for small tilts I might not catch manually. Most modern instruments have a dual-axis compensator.
- Laser plummet: A red dot that projects downward through the base, helping me center the instrument directly over a ground mark. Way more accurate than an optical plumb bob in most conditions.
Understanding how each of these parts works together is what separates a surveyor who gets clean data from one who spends hours re-shooting measurements.
Choosing the Right Total Station for Your Survey Type
Not every total station is built for every job, and I’ve learned this the hard way. When I’m helping someone decide what instrument to use — or buy — I always start by asking what kind of work they’re doing, how often, and what their budget looks like.
Here’s a breakdown of the main categories I work with:
By Technology Type
| Type | Best For | Key Feature |
| Reflectorless Total Station | Inaccessible areas, facades, road surveys | Can measure without a prism |
| Robotic Total Station | Solo operators, large open sites | Self-tracking, remote control via controller |
| Conventional Total Station | Standard land surveys, construction staking | Requires a second person with a prism pole |
| Scanning Total Station | High-density data collection, as-built surveys | Captures thousands of points automatically |
By Accuracy Rating
Accuracy in total stations is measured in seconds of arc for angular precision and millimeters + ppm for distance. For most land surveying equipment applications, I use instruments with 2″ to 5″ angular accuracy. For precision control surveys, I go with 1″ instruments.
Total Station Price and Cost Considerations
One thing I get asked about constantly is total station price, and honestly the range is wider than most people expect. Here’s a rough guide based on what I’ve seen in the market:
- Entry-level conventional total stations: ₹1,42,875 – ₹3,81,666. Fine for basic construction layout, but limited software features.
- Mid-range instruments: ₹4,77,083 – ₹11,44,797. This is where I find the best balance of features and total station cost for professional land surveyors doing everyday work.
- Robotic and scanning models: ₹14,30,997 – ₹57,24,126+. These are serious investments but they pay off fast on large projects or when you’re working solo.
My honest advice: don’t just buy the cheapest option to save money upfront. A poor angular accuracy or unreliable EDM will cost me more in rework and re-observation time than the price difference ever saved.
I also always check whether the manufacturer offers local service and support. A $30,000 instrument sitting dead on a job site because I can’t get it repaired locally is a nightmare I’d rather avoid.
Essential Accessories You Need to Bring to the Field
Even the best total station in the world won’t perform properly without the right accessories around it. Over the years, I’ve built a field kit that I never leave behind, no matter how short the job seems.
Prisms and Prism Poles
- Single prism and mini prism: I carry both. The mini prism is a lifesaver for tight spaces and interior work.
- 360-degree prism: Essential when I’m using a robotic total station, since it lets the instrument track me from any direction.
- Prism pole with bubble level: Keeps the prism plumb over the ground point while I’m collecting shots. A wobbly pole kills measurement accuracy.
Tripods
I always bring at least two tripods — one for the total station and one for the target or reference prism at my backsight point. I prefer aluminum tripods with adjustable legs for uneven terrain, though wood tripods offer better vibration dampening on hard surfaces.
Controllers and Data Collectors
Most modern total stations either have an onboard controller or pair with an external data collector running survey software like Trimble Access, Leica Captivate, or Carlson SurvCE. I always make sure my controller is:
- Fully charged before leaving the office
- Loaded with the correct coordinate system and project file
- Backed up with a fresh copy of my control point database
Batteries and Power
Running out of battery in the field is one of the most avoidable problems there is. I bring:
- At least two fully charged batteries for the total station
- A backup battery for my data collector
- A small portable power bank for extended field days